
Propagating African Violets: A Foolproof Step-by-Step Guide sets the stage for this enthralling narrative, offering readers a glimpse into a world of vibrant blooms and simple propagation techniques. African violets, renowned for their delicate beauty and ease of care, are a popular choice for indoor gardeners.
Their popularity stems from their captivating blooms, which come in a kaleidoscope of colors, and their ability to thrive in various indoor environments.
This guide delves into the art of propagating African violets, unraveling the secrets to successfully multiplying these beloved houseplants. From selecting healthy leaves to nurturing new growth, each step is meticulously Artikeld, ensuring a rewarding experience for novice and experienced plant enthusiasts alike.
Introduction to African Violets
African violets are a popular choice for houseplants due to their vibrant colors, compact size, and relative ease of care. They are known for their delicate beauty and ability to brighten up any indoor space. These plants are native to the tropical regions of East Africa, where they thrive in shady, humid environments.
They are not true violets, but rather belong to the genus Saintpaulia, named after Baron Walter von Saint Paul-Illaire, who discovered them in 1892.
Characteristics of African Violets
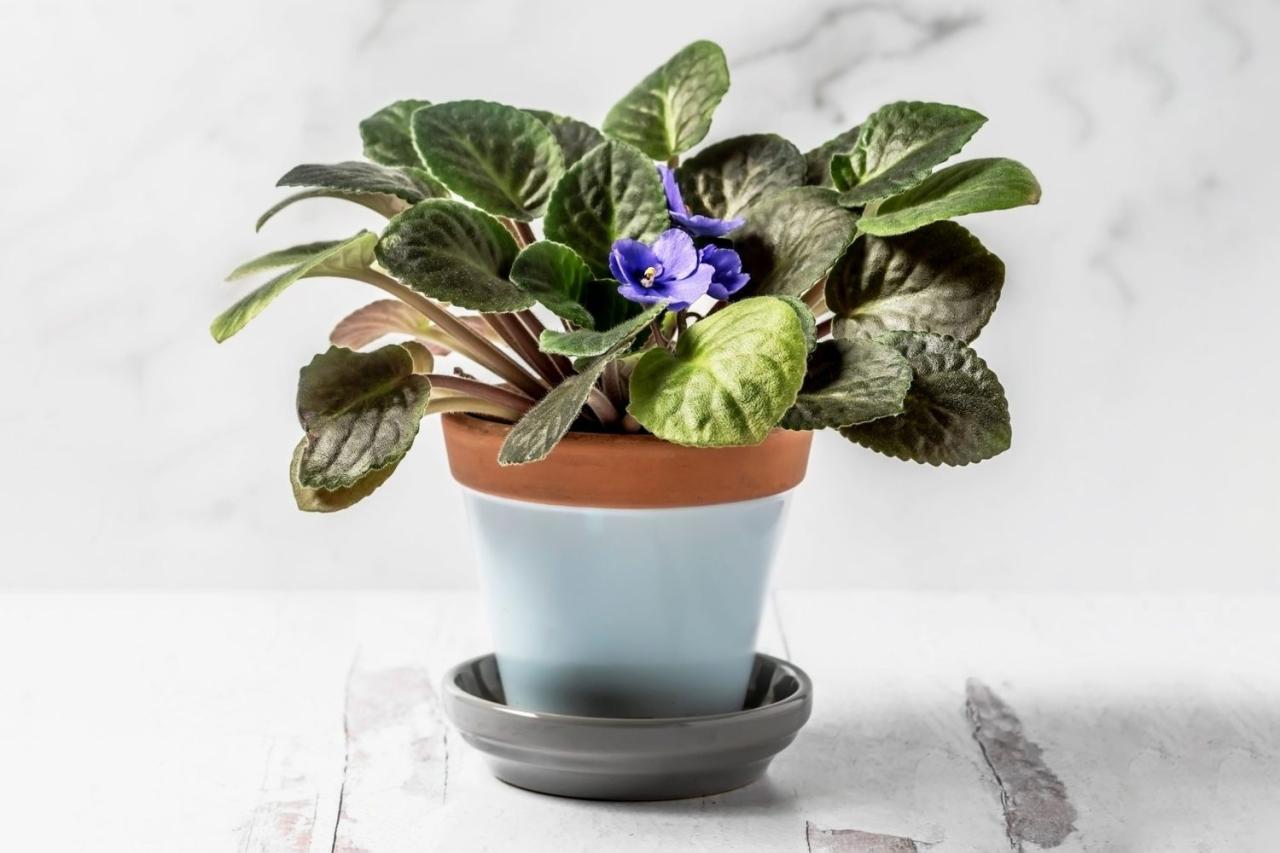
African violets are prized for their distinctive foliage and captivating blooms. Their leaves are typically velvety and heart-shaped, with a slightly scalloped edge. They come in a wide range of colors, including purple, pink, blue, red, white, and even bicolors.
The flowers are usually small and star-shaped, with five petals.African violets are known for their prolific blooming habits. They can flower year-round under optimal conditions, with a peak blooming season in spring and summer. However, they are also sensitive to changes in light, temperature, and humidity, which can affect their flowering frequency.
Why African Violets are Easy to Propagate
African violets are relatively easy to propagate, which means you can easily create new plants from cuttings or leaf pieces. This is because they have a natural tendency to root easily, making them an excellent choice for beginner gardeners.
Propagation Methods
Propagating African violets is a rewarding experience that allows you to expand your collection and share these beautiful plants with others. Several methods can be used to create new African violet plants from existing ones. The most common methods include leaf cuttings, stem cuttings, and division.
Each method has its own advantages and disadvantages, so it is important to choose the method that best suits your needs and experience level.
Leaf Cuttings, Propagating African Violets: A Foolproof Step-by-Step Guide
Leaf cuttings are the most common and successful method for propagating African violets. This method involves taking a healthy leaf from a mature plant and rooting it to develop a new plant.Leaf cuttings are a simple and effective method for propagating African violets.
To propagate African violets using leaf cuttings, you will need:
- A sharp, clean knife or pair of scissors
- A pot filled with a well-draining potting mix
- A clear plastic bag or dome
- A well-lit location, but out of direct sunlight
Here is a step-by-step guide for propagating African violets using leaf cuttings:
- Select a healthy leaf from the plant, ideally one that is about half-grown and not too old or too young.
- Using a sharp, clean knife or pair of scissors, cut the leaf at the base, making sure to leave about 1 inch of stem attached.
- Dip the cut end of the leaf in rooting hormone powder, if desired. Rooting hormone can help to encourage root growth.
- Fill a pot with a well-draining potting mix. African violets prefer a slightly acidic soil with a pH of 6.0 to 6.5.
- Make a small hole in the potting mix with your finger or a pencil. Insert the cut end of the leaf into the hole, ensuring that the leaf is positioned vertically.
- Gently firm the soil around the leaf to secure it in place.
- Water the soil thoroughly, making sure to avoid getting water on the leaf itself.
- Cover the pot with a clear plastic bag or dome to create a humid environment.
- Place the pot in a well-lit location, but out of direct sunlight.
- Keep the soil moist but not soggy. Water the soil as needed, allowing the top inch of soil to dry out between waterings.
- After a few weeks, you should see new growth emerging from the base of the leaf. Once the new plant has developed a few leaves, you can remove the plastic bag or dome.
- When the new plant is large enough, you can transplant it into a larger pot with fresh potting mix.
Advantages of Leaf Cuttings:
- High success rate
- Relatively easy to execute
- Can be done with just one leaf
- Produces multiple plantlets from a single leaf
Disadvantages of Leaf Cuttings:
- Can take several months for new plants to develop
- Requires patience and consistent care
Stem Cuttings
Stem cuttings involve taking a section of stem with leaves attached and rooting it to produce a new plant. This method is less common than leaf cuttings, but it can be a viable option for certain African violet varieties.To propagate African violets using stem cuttings, you will need:
- A sharp, clean knife or pair of scissors
- A pot filled with a well-draining potting mix
- A clear plastic bag or dome
- A well-lit location, but out of direct sunlight
Here is a step-by-step guide for propagating African violets using stem cuttings:
- Select a healthy stem with at least two sets of leaves. The stem should be about 2-3 inches long.
- Using a sharp, clean knife or pair of scissors, cut the stem just below a node, which is the point where a leaf grows from the stem.
- Remove the bottom leaves from the stem, leaving only the top two sets of leaves.
- Dip the cut end of the stem in rooting hormone powder, if desired.
- Fill a pot with a well-draining potting mix. African violets prefer a slightly acidic soil with a pH of 6.0 to 6.5.
- Make a small hole in the potting mix with your finger or a pencil. Insert the cut end of the stem into the hole, ensuring that the stem is positioned vertically.
- Gently firm the soil around the stem to secure it in place.
- Water the soil thoroughly, making sure to avoid getting water on the leaves.
- Cover the pot with a clear plastic bag or dome to create a humid environment.
- Place the pot in a well-lit location, but out of direct sunlight.
- Keep the soil moist but not soggy. Water the soil as needed, allowing the top inch of soil to dry out between waterings.
- After a few weeks, you should see new growth emerging from the base of the stem. Once the new plant has developed a few leaves, you can remove the plastic bag or dome.
- When the new plant is large enough, you can transplant it into a larger pot with fresh potting mix.
Advantages of Stem Cuttings:
- Can be faster than leaf cuttings, as new plants can develop within a few weeks.
- Can be used for varieties that are difficult to propagate from leaf cuttings.
Disadvantages of Stem Cuttings:
- Lower success rate than leaf cuttings.
- May require more experience to execute successfully.
Division
Division is a method of propagating African violets by separating the plant into multiple smaller plants. This method is best suited for mature plants that have developed multiple crowns.To propagate African violets using division, you will need:
- A sharp, clean knife or pair of scissors
- A pot filled with a well-draining potting mix
- A well-lit location, but out of direct sunlight
Here is a step-by-step guide for propagating African violets using division:
- Gently remove the plant from its pot.
- Carefully separate the plant into multiple smaller plants, making sure that each plant has its own roots and crown.
- If necessary, use a sharp, clean knife or pair of scissors to cut through any tangled roots.
- Pot each new plant in a pot filled with a well-draining potting mix.
- Water the soil thoroughly, making sure to avoid getting water on the leaves.
- Place the pots in a well-lit location, but out of direct sunlight.
- Keep the soil moist but not soggy. Water the soil as needed, allowing the top inch of soil to dry out between waterings.
Advantages of Division:
- Relatively quick and easy method for mature plants.
- Produces multiple new plants at once.
Disadvantages of Division:
- Not suitable for all African violet varieties.
- Can be stressful for the plant if done incorrectly.
Preparing for Propagation
Success in propagating African violets starts with a solid foundation. Before you begin, it’s crucial to gather the right materials and prepare them properly to ensure a healthy environment for your new plants.
Selecting Healthy Leaves or Stems
Choosing healthy leaves or stems is essential for successful propagation. Look for leaves that are vibrant green, free from any signs of disease or pests. The leaves should be firm to the touch, not limp or wilting. Select leaves from the middle of the plant, as they are typically more mature and vigorous.
Avoid using leaves that are too young or too old. When selecting stems, choose ones that are sturdy and have at least one node, where roots will eventually grow.
Sterilizing Tools and Containers
Maintaining a clean and sterile environment is vital to prevent infections and diseases in your African violet cuttings. It is recommended to use sterilized tools and containers to minimize the risk of contamination.
- Tools:Before using any tools, such as scissors, knives, or tweezers, sterilize them by wiping them down with rubbing alcohol or dipping them in a solution of bleach and water (1:10 dilution). Allow the tools to air dry completely before using them.
- Containers:Wash containers thoroughly with soap and water, then rinse them well. To further sterilize, you can soak them in a bleach solution (1:10 dilution) for 10 minutes, followed by rinsing them thoroughly with clean water. Allow the containers to air dry completely before use.
Preparing the Rooting Medium
The rooting medium plays a crucial role in providing the necessary moisture and nutrients for your African violet cuttings to develop roots. A well-draining soil mix or a specialized rooting medium is essential for success.
- Soil Mix:A well-draining soil mix can be created by combining equal parts of peat moss, perlite, and vermiculite. This mixture provides good aeration and moisture retention, essential for root development.
- Rooting Medium:Specialized rooting mediums, such as vermiculite or a peat moss-based mix, are readily available and provide a suitable environment for root growth.
- Sterilization:To ensure a sterile environment, you can sterilize the rooting medium by microwaving it for 1-2 minutes or baking it in the oven at 180°C (350°F) for 30 minutes. Allow the medium to cool completely before using it.
Rooting and Care

Once you have prepared your cuttings, the next step is to provide the right environment for them to develop roots. This process involves creating ideal conditions for growth and ensuring the cuttings are properly cared for.
Ideal Rooting Conditions
Creating the right environment for your African violet cuttings is crucial for successful propagation. The ideal conditions include a warm, humid environment with adequate light.
- Temperature:African violet cuttings thrive in temperatures between 70-75°F (21-24°C). These temperatures promote root development and overall growth.
- Humidity:High humidity is essential for successful rooting. You can achieve this by placing the cuttings in a humid environment, such as a propagator dome or a plastic bag. Alternatively, you can mist the cuttings regularly with water.
Light Requirements
While African violets need light to thrive, they are sensitive to direct sunlight.
- Indirect Light:African violet cuttings require bright, indirect light. Place them in a location that receives ample light but avoids direct sunlight. Direct sunlight can scorch the leaves and hinder root development.
- Artificial Light:If you do not have access to sufficient natural light, you can use artificial light sources, such as fluorescent bulbs, to provide the necessary illumination.
Watering the Cuttings
Watering the cuttings correctly is crucial for maintaining moisture without overwatering.
- Moisture:The rooting medium should be consistently moist but not soggy. Overwatering can lead to root rot, which can kill the cuttings.
- Watering Technique:Water the cuttings sparingly, allowing the top layer of the rooting medium to dry slightly between waterings. Use a watering can with a fine rose to gently water the cuttings, avoiding direct contact with the leaves.
Signs of Successful Rooting
The appearance of new growth is a clear indication that your African violet cuttings have successfully rooted.
- Root Development:After a few weeks, you should notice the development of new roots at the base of the cuttings. These roots will be small and white, and they will gradually grow longer and thicker as the cuttings establish themselves.
- New Growth:Within a few weeks of rooting, you will also see new leaves emerging from the cuttings. This is a sure sign that the cuttings are healthy and thriving.
Transplanting and Continued Care

Once your African violet cuttings have developed a healthy root system, it’s time to give them their own homes in individual pots. This step is crucial for their continued growth and development.
Propagating African Violets: A Foolproof Step-by-Step Guide provides a comprehensive approach to growing these beautiful plants from cuttings. While this guide focuses on a specific species, the principles of propagation are universal, even extending to the art of Bonsai.
Just like with African Violets, Bonsai requires patience, careful pruning, and an understanding of the plant’s needs to achieve its full potential. Propagating African Violets can be a rewarding experience, allowing you to create a thriving collection of these stunning houseplants.
Transplanting the Cuttings
Transplanting rooted African violet cuttings into individual pots requires gentle handling to avoid damaging their delicate roots. Use a well-draining potting mix specifically designed for African violets, ensuring proper drainage to prevent root rot. The ideal pot size for young African violets is 2-3 inches in diameter.
- Choose a pot with drainage holes to prevent waterlogging.
- Fill the pot with African violet potting mix, leaving about an inch of space at the top.
- Gently remove the rooted cutting from its propagation container, taking care not to disturb the roots.
- Place the cutting in the center of the pot, ensuring the root ball is level with the soil surface.
- Carefully fill the pot with potting mix around the roots, gently pressing down to secure the cutting.
- Water the newly transplanted cutting thoroughly, allowing excess water to drain.
Potting Mix and Pot Size
The ideal potting mix for African violets is a light, airy blend that provides good drainage and aeration. A well-draining mix prevents root rot and promotes healthy root development. Avoid using heavy, dense potting mixes that can compact and impede root growth.
- African violet potting mixes typically consist of a blend of peat moss, vermiculite, and perlite, with added ingredients like coco coir or bark for structure.
- The pot size for newly transplanted African violets should be small, ideally 2-3 inches in diameter.
- This size allows for sufficient space for root development while minimizing the risk of overwatering.
Ongoing Care
Once your African violet cuttings have been successfully transplanted, they require consistent care to thrive. Proper watering, fertilization, and light exposure are crucial for healthy growth and abundant blooming.
Watering
African violets are sensitive to overwatering, so it’s essential to water them only when the top inch of soil is dry. Overwatering can lead to root rot and other problems.
- Use lukewarm water and water thoroughly, allowing excess water to drain.
- Avoid getting water on the leaves, as this can cause spotting and disease.
- Water in the morning to allow the soil to dry somewhat before nightfall.
Fertilization
African violets are light feeders and benefit from regular fertilization during the growing season. Use a balanced, water-soluble fertilizer specifically formulated for African violets.
- Apply fertilizer at half the recommended strength to avoid over-fertilizing.
- Fertilize every 2-4 weeks during the growing season.
- Reduce or stop fertilizing during the winter months when growth slows.
Light Exposure
African violets thrive in bright, indirect light. They should not be exposed to direct sunlight, which can scorch their leaves.
- Place your African violets in a location that receives bright, indirect light for at least 6 hours daily.
- Avoid placing them near a south-facing window, where they may receive too much direct sunlight.
- You can supplement natural light with artificial light sources, such as fluorescent bulbs or grow lights, if necessary.
Maintaining Healthy Growth and Blooming
To encourage healthy growth and abundant blooming in your propagated African violets, follow these tips:
- Regularly check for pests and diseases:Inspect your plants regularly for signs of pests like aphids, mealybugs, or spider mites. Treat any infestations promptly.
- Pinch back the growing tips:Pinch off the growing tips of your African violets to encourage bushier growth and more flowers.
- Repot as needed:As your African violets grow, you may need to repot them into larger pots. Repot when the roots are circling around the inside of the pot.
- Maintain a consistent temperature:African violets prefer temperatures between 65-75 degrees Fahrenheit. Avoid exposing them to extreme temperatures or drafts.
- Provide adequate humidity:African violets thrive in humid environments. You can increase humidity by placing a tray of water near the plants or by using a humidifier.
Troubleshooting and Common Problems
While African violets are generally easy to propagate, there are a few common issues that can arise. Understanding these potential problems and implementing preventative measures can greatly increase your success rate. By addressing these challenges promptly, you can ensure healthy and thriving new plants.
Root Rot
Root rot is a common problem that can affect African violet cuttings. It occurs when the roots are constantly exposed to excessive moisture, leading to decay and fungal growth.
- Overwatering is the primary cause of root rot. It’s crucial to allow the soil to dry slightly between waterings, ensuring good drainage.
- Using a well-draining potting mix is essential. A mix that retains some moisture but allows excess water to drain quickly is ideal.
- Avoid over-packing the soil in the propagation container, as this can hinder drainage.
If you suspect root rot, it’s important to act quickly. Remove the cutting from the soil and inspect the roots. If they are mushy, brown, or have a foul odor, they are likely infected. Trim away any affected roots with a sharp, sterile knife.
Repot the cutting in fresh, sterile soil, ensuring good drainage. Consider using a fungicide to prevent further infection.
Fungal Infections
Fungal infections can affect African violet cuttings, often manifesting as leaf spots, powdery mildew, or mold growth.
- Overwatering and poor air circulation are key factors contributing to fungal infections.
- Avoid getting water on the leaves, as this can create a humid environment conducive to fungal growth.
- Ensure adequate airflow around the cuttings by spacing them appropriately and providing sufficient ventilation.
If you notice signs of a fungal infection, remove any infected leaves or stems immediately. Use a fungicide designed for African violets to treat the infection. You can also try a homemade solution of baking soda and water, but it may not be as effective as a commercial fungicide.
Pest Infestations
African violet cuttings can be susceptible to various pests, including aphids, mealybugs, and spider mites.
- Regularly inspect your cuttings for signs of pests, such as sticky residue, webbing, or tiny insects.
- Isolate any infested cuttings to prevent the spread of pests to other plants.
- Use insecticidal soap or neem oil to treat infestations.
These solutions can effectively control pests without harming the delicate leaves of African violets.
Conclusion
This guide has demonstrated that propagating African violets is an accessible and rewarding endeavor, even for novice plant enthusiasts. The methods presented are simple, effective, and require minimal resources. The key takeaway is that patience and observation are crucial for successful propagation.
With a little care and attention, you can easily multiply your African violet collection and enjoy the beauty of these vibrant plants.
Experimentation and Sharing
Propagating African violets is a fun and engaging activity. Experimenting with different methods, such as leaf cuttings, stem cuttings, or crown division, allows you to discover what works best for you. Share your experiences and successes with other plant enthusiasts, contributing to the growing community of African violet lovers.
Summary
Armed with the knowledge gleaned from this guide, you are now equipped to embark on a journey of propagating African violets, transforming a single plant into a flourishing collection. Experiment with different methods, observe the fascinating process of new life emerging, and share your successes with fellow plant lovers.
The beauty of African violets, combined with the satisfaction of propagation, will undoubtedly enrich your gardening experience.
Question Bank: Propagating African Violets: A Foolproof Step-by-Step Guide
Can I propagate African violets from seeds?
While it is possible to propagate African violets from seeds, it is a less common method than leaf or stem cuttings. Seeds can be difficult to germinate and may not produce plants that are true to the parent plant’s characteristics.
What is the best time of year to propagate African violets?
African violets can be propagated year-round, but the best time is during the spring and summer months when the plant is actively growing. Warmer temperatures and longer days provide optimal conditions for rooting.
Can I use tap water to water my African violet cuttings?
Tap water often contains minerals and chemicals that can harm African violets. It’s best to use distilled water, rainwater, or bottled water for watering cuttings.
